YOU get a brownie! YOU get a brownie! YOU get a brownie!!
Everyone nowadays seems to be free of something… Gluten. Lactose. Grain. Sugar.
So it’s really hard to please everyone with just one recipe. The gluten free people can’t have bread, and gluten free bread generally doesn’t taste like bread, so nobody wins. Lactose is in dairy and dairy makes cheese and dairy free cheese isn’t so awesome, and so on and so forth.
And it’s tough being a recipe developer in a time when there seems to be so many people turning their backs on ‘standard’ recipes and a laundry list of easy-to-use ingredients. The good thing about it is that it causes me to get really creative in the kitchen. And I do love a good challenge.
I eat everything. I try to be as healthy as I can while still eating real and whole foods… But I don’t have any food allergies or aversions. So when I write a recipe that eliminates a somewhat ‘normal’ ingredient, you can be positive that recipe is as good as it could ever be. Because if I love wheat and dairy and know what white sugar and real chocolate tastes like, and yet am giving you a brownie recipe eliminating those things…? It’s a damn good alternative brownie, y’all.
This is my favorite of all my brownie recipes. It really and truly is. And it’s gluten free, dairy free (eggs are involved), and processed sugar free. It’s also got a high fiber count for a brownie… just sayin’.
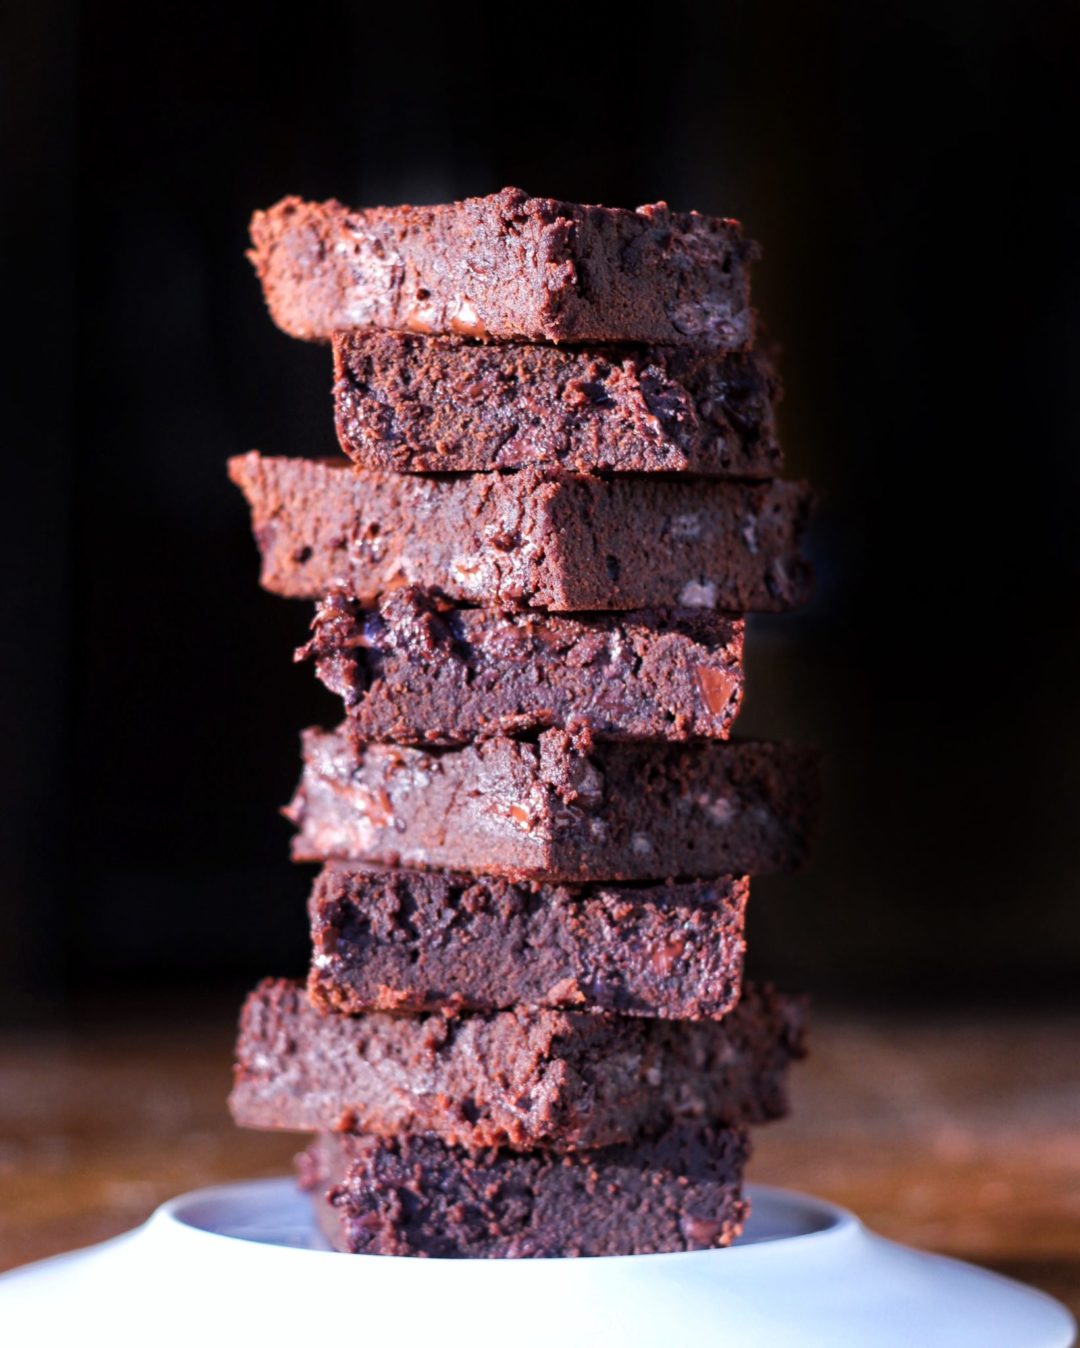
But these are NOT FLAVOR FREE. They’re fudgey. And moist. And dense. With studs of dark chocolate morsels throughout… the kind of brownie that you take a bite of and most of it sticks to the roof of your mouth? The kind that demands milk on the side? (Whether that would be lactose free, almond, coconut or cashewed goat’s milk- that’s your choice.) But that’s what this brownie is. It just also happens to be better for you than the rest.
So trust me when I say these stack up to be the best of the best.
DARK CHOCOLATE ESPRESSO BROWNIES
GLUTEN FREE . DAIRY FREE. REFINED / PROCESSED SUGAR FREE
I’ve posted this recipe before, but it was when I didn’t know how to take a proper photo. I do still encourage you to go visit the old post, just to see (bad quality) pictures of my babies eating these… like most of my old posts have. That’s the great benefit of having this blog for so long… I can continue to update photos and recipes when I grow as an artist and writer, but I will always have sweet memories to look back on.
In a large, microwave-safe mixing bowl, combine the following…
- 1/3 cup coconut oil
- 1 cup (light) agave nectar
- 1/2 cup cocoa powder
- 1 TB espresso powder (or instant coffee… and I like to use decaf in my baking)
Microwave for 1-2 minutes, until the coconut oil has melted. Whisk to combine. It should be smooth and glossy now. Set aside to cool slightly.
In another smaller bowl, combine the following…
- 4 large eggs
- good splash vanilla extract
Whisk well, until all the egg whites have been broken down.
Slowly pour this egg mixture into the slightly cooled coconut/cocoa mixture. Add a little at a time, whisking as you go, so the eggs don’t scramble.
Stir in the following…
- 1/2 cup coconut flour
- 1 tsp kosher salt
Whisk until no lumps are present.
By spatula, stir in…
- 1 cup dark or semi sweet chocolate morsels
(Use the natural kind to keep your sugar content in check, and be sure to read the labels to check for dairy. Health food stores sell dairy free and naturally sweetened options- Sunspire having a lot of various options for different dietary needs. And I DO NOT mean stevia sweetened, as I happen to think the flavor is offputting. But if your favorite brand uses stevia and you like it, then you are free to do what you wish!)
Once the batter is completely mixed, pour into a greased 9×9 inch baking pan. Mine is ceramic.
Bake in a preheated 325 oven for 20-25 minutes. You want the center to appear glossy, and the edges to have pulled away from the sides of the pan. Do not overbake.
Cool in the pan on a rack until safe to touch.
Eat warm.
By hand or by fork.
Bonus points for vanilla ice cream.


No Comments