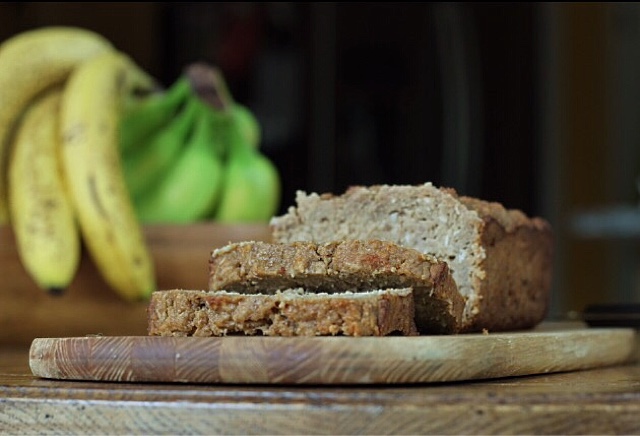
I’ve been making banana bread for like, years now. Way back when my husband and I first started living together, before we were married, I found some recipe for banana bread somewhere and changed a few things to make it ‘healthier’ and began making it. This was back in my days of chemicals are better for me if they’re zero calorie.
So, I was using all sorts of fake stuff to make myself feel better about eating…bread. Then I came around and became a mom and started cooking and baking like a normal person. So the banana bread (still the same base recipe, which has always been Coconut-Banana Bread) had real flour, real sugar, real eggs, butter…you know, all the good stuff. Now I’m in a different phase in my culinary life. I still want real food but I just want to make my real food be as healthy as possible. If I can make some small, healthy changes to a recipe that don’t change the flavor or texture of a dish in a negative way then I will do it. Why not, right?
I’ve been experimenting a lot with alternate, natural forms of sugar and flour lately and have had some real mishaps, but some big successes as well. (This bread would be one of the successes, otherwise why would I be telling you all this?) I do not have celiac disease, or a severe intolerance to wheat, but I do know that many people out there do. I know that other grains are better on my system than wheat so when I can take the wheat out of something, and make it taste great, even better
than the original recipe, then I feel pretty darn good about it. And as far as sugar is concerned, I view it as the one ingredient that I have a bone to pick with. I think we over-sugar ourselves in this country.
We over-sugar and under-fiber. We, as a country, are either not
concerned about health whatsoever or we’re too concerned about fat and
calories. Fat isn’t the bad guy, in my opinion. (Unnecessary,
saturated fat and grease isn’t good, but I’m talking about normal
amounts of fat.) We need fat!…and calories! We don’t need
white sugar. I believe the bad guy, when it comes to food, is sugar. I
don’t like to eat a lot of it, I don’t like my kids to eat a lot of it,
and therefore I try to limit it as much as possible. Don’t get me
wrong…we still eat it. I’m not a crazy person. You can look in my
pantry and find many things in there with sugar, you will also find
just, plain sugar. But, I use it in moderation and love the idea of
using alternate forms of (naturally occurring) sugar whenever I can in
baked goods.
So…in my new banana bread, I changed my old recipe again to make it gluten and processed sugar free (NO chemically made sugar replacements!!!) And I can thank Mr. Oat and Mrs.
Coconut for the help. I’m primarily using oat flour with a bit of
coconut flour as the backbone of the recipe. Oats are extremely healthy
for you, contain good fiber, they have a great, sweet flavor and the
flour form of it works beautifully in this quick bread. And Coconut flour
is one of my new friends. It’s a bit more difficult to work with, as
it can dry out your baked goods by soaking up all the liquid, so you
have to compensate by adding more liquid to your recipe. For instance,
if you’re adding 1/2 cup of coconut flour to replace some of the flour
called for in a recipe, then you will need to add 1/2 cup of extra
liquid to balance it out. (Oat flour, on the other hand, can be
substituted cup for cup.) As for the wet ingredients, I, again, take
help from the coconut. I use coconut oil (along with some unsweetened
applesauce) to replace the butter I used to use. I also use, instead of
my usual brown sugar, Coconut Palm Sugar
in this recipe. That’s another new friend of mine. It’s dark brown in
color, like brown sugar, and has a slightly graham-like and toasty
sweet flavor to it. This is the first recipe I’ve incorporated it into
and it worked perfectly here.
There’s no dairy (except eggs) in this recipe, it’s completely gluten and traditional sugar free,
so it contains things that are actually good for you, things that your
bodies can actually use, and it tastes better than any of my
other versions. It’s so moist, very hearty, and both of my kids cannot
stop eating it. And finally, after years and years of changing the
recipe, I can officially say that there is nothing wrong with having
another slice.
Enjoy!!
GLUTEN FREE & PROCESSED SUGAR FREE
BANANA BREAD
In a large mixing bowl, combine the following:
-3/4 cup coconut palm sugar
-1/2 cup unsweetened applesauce
-2 TB coconut oil
-2 large eggs
-4-5 very ripe bananas broken into chunks (4 if they’re large, 5 if they’re smaller)
-1/2 cup orange juice
-1 tsp vanilla extract
Blend,
with an electric mixer if you have one, until mostly pureed. (The
coconut oil will begin to soften with the warmth of the beaters and the
bananas, although they will give you a good fight, will break down
eventually so don’t worry about doing any of this in steps.)
Now add in the dry (no need for separate bowls here, it’s so easy!!):
-1 1/2 cups oat flour
(Please don’t buy it. Just take your rolled oats and put them in a clean
coffee grinder, food processor or blender and pulse until it looks like
flour. Done.)
-1/2 cup coconut flour
-1 1/2 tsp baking powder
-1/2 tsp ground cinnamon
-1/2 tsp ground, dried ginger
-1 1/2 tsp kosher salt + a pinch
Mix again until all the dry has disappeared into the wet.
Fold in the following and stir until just combined:
-1/2 cup unsweetened coconut flakes or shredded coconut
Pour your batter into a well-greased, standard sized loaf pan (mine is glass).
Bake at 350 for an hour, but maybe check it at 45 minutes just to be sure since I don’t know your oven.
It should be golden brown around the sides of the bread, a bit at the top
edges and firm to the touch and shake. Use a toothpick or wooden skewer
to check the doneness at the center of the loaf and if it comes out with some moist crumbs attached, then your bread is done. If the toothpick is goopy, it’s not. If it’s
completely dry, you may have overcooked it. But…I made sure that the
batter is so moist that even if you over-cook it slightly, it shouldn’t
be a problem. Worst case scenario: You’re toasting it and slathering
it with peanut butter or cream cheese. (That don’t sound too worst to
me.)
Allow to cool in the pans until you can safely handle them without burning yourself. Transfer to a rack to finish cooling.
This
can be enjoyed warm or room temperature. And the loaves are OK to be
stored at room temp (airtight) for a couple days, but after that, I would refrigerate.
And as you can see above, I doubled the recipe so I could freeze one. If
you plan on freezing yours, let it cool completely and then wrap tightly
and completely in plastic wrap and then tightly and completely in tin
foil. It will keep for 3 months this way, but I will most likely be
retrieving mine in, oh, one day.
(*for muffins, you should get about 16 per recipe and the baking time will be around 25 minutes)


1 Comment
… ecoffeegrinder.blogspot.com