I have always had a tough time making the perfect pie crust. Every recipe I use always comes out tasting wonderful, but I’ve never been able to make a crack-free crust from any of my recipes. In my lifetime of cooking I’ve never sought out to make perfect looking things, as long as my food tastes good, I’m happy. But…I’ll admit this has still bothered me for quite some time.
Now, there are two different ways to make pie dough. One way is to use your fingertips to incorporate the fat (butter is my favorite) into the dry ingredients before adding the cold water by hand until your dough is complete. This is the way generations before me made their pies and for that reason, I love it. I like the feeling of the cold butter on my fingertips. I like how it connects me with the past. But it’s messy and demands a leisurely mentality, which, let’s be honest, doesn’t always exist anymore. But there’s another way to make delicious pie dough, and it’s the way I actually prefer to do it now. It’s quicker, easier and, to tell you the truth, it produces a much better crust (in my opinion). Even Julia Child admitted that the only reason she saw in buying a food processor was to use it for pie dough. And Julia would be the ultimate go-to for all things butter, wouldn’t she?
The key to a flaky pie crust is to make sure your butter stays very very cold and that it breaks down into pea-sized pieces as it mixes with the flour and salt. This is what produces a flaky crust. The issue with this is that your fingertips are warm and will start to raise the butter temp as you’re trying to get it incorporated. And if you’re using a food processor, you still have to cut your cold butter into tiny pieces before adding it the flour, which is fine but…I love the food processor for those times when I just don’t want to have to use my hands. That’s kind of the point of those things, I think.
So I came up with a solution. I figured out a way to make pie crust so fast you won’t even realize you’ve done it. And it comes out tasting better than ever. I even managed to roll it out all nice and purty!!
Win-win!
Inatead of cutting the butter up before adding it to the food processor, I thought…what about using a cheese grater to get the perfect tiny pieces into the flour? I could hold onto the butter by keeping the wrapper on, which should make for an easier time. I first grated a FROZEN stick of butter into the flour mixture that was in the food processor. And it worked perfectly.
It was a little messy, took a little bit of time, but it worked very well. The dough came out beautiful and tasty.
But then, a new idea came to me early the next morning. I swear to you that I shot out of bed like I was battery operated when I thought of it. You see, what was bugging me about my new idea was the fact that I’m still putting in a lot of elbow grease to be using a ‘time saver’ machine. Plus, I still managed to get all buttery while doing it. So… My new idea was to use the shredder disk attachment that comes with the food processor. Duh! It seemed too simple to actually work. But I tried it and I had perfectly cut butter in 5 seconds!!
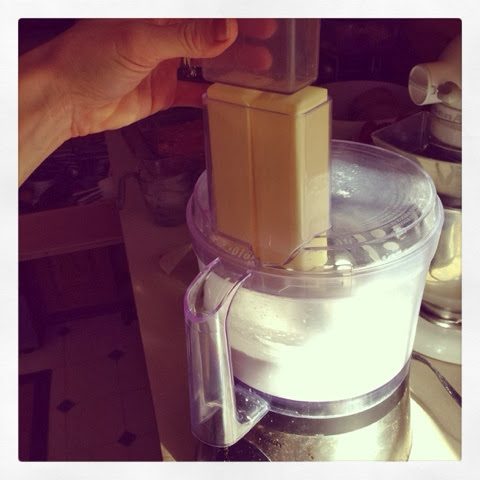
The compartment on my processor lid is even the perfect size for two sticks of butter! And when you keep the blade in on the bottom, the butter is being incorporated into the flour while you’re ‘shredding’ the butter. That’s taking two steps and cutting it down to just one. Genius.
I used my new method while testing out a new recipe for a gluten free pie crust. It was unbelievable-Texture, flavor, ease of preparation… And I’m so excited to share it with you all! Just in time for all that holiday baking…
(This method works just as well with a traditional dough. And need I remind you that I love my gluten. So if I say this is good, it must be!!)
*The Best Gluten Free Pie Dough
(made easily in the food processor!)
(Recipe makes 2 crusts, freezes well for up to 3 months if wrapped tightly.)
(First, make sure you are working with frozen butter. Put it in the night before if need be, but it must be completely frozen.)
Add the following dry ingredients into the bowl of your food processor, with the blade inserted:
-1 cup white rice flour
-1/2 cup coconut flour
-1/2 cup cornstarch (tapioca starch can also be used)
-1 rounded tsp kosher salt
Pulse this a couple times to mix.
Attach the shredder disk to the top of your processor but leave the blade in at the bottom.
Replace the lid.
Place 2 sticks (1 cup) of FROZEN, unsalted butter into the feeding space…
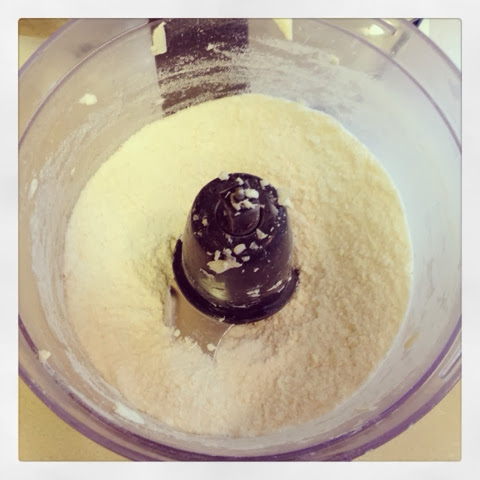
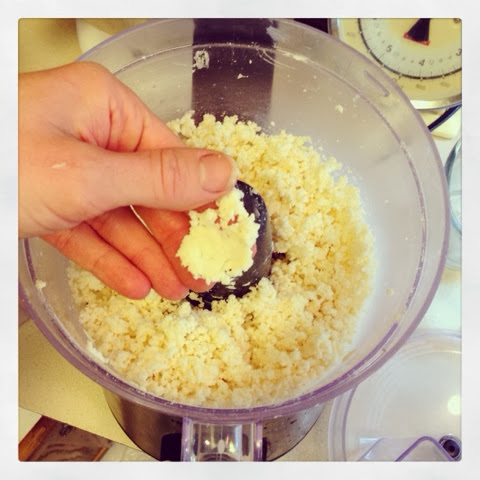
…and with the processor turned on, press the butter down to be shredded into the flour down below. Your mixture should resemble the kind of grated ‘Parmesan’ cheese you would buy in one of those plastic shaker containers…
Remove the shredder disk. Replace lid. With the mixer on, slowly drizzle ~1/2 cup of ice water into the spout. Do it slowly as you don’t want to add too much. You know you’ve added enough when you can easily form a dough ball by gently squeezing some mixture between your fingers.
Turn your dough out onto a flat surface lightly dusted with cornstarch. (Keep some cornstarch nearby in case you made your dough too wet.) Mold with your hands into two, equal sized flat disks.
Wrap each disk in plastic wrap and place in the fridge to chill until you’re ready to use them.
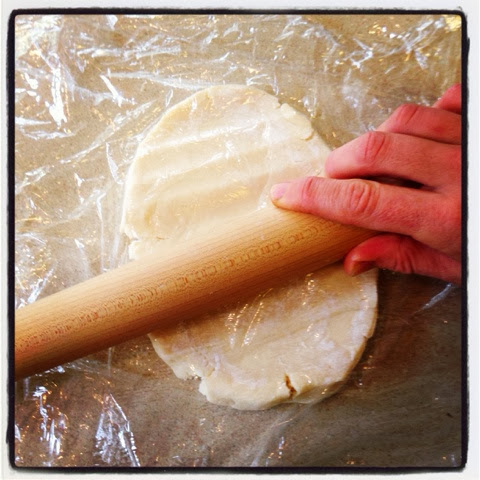
When you’re ready to roll, unwrap one dough disk at a time and leave sitting on the plastic. Place another sheet of plastic on top and bang it with your rolling pin to quickly flatten it a bit before rolling. (This ensures that you don’t begin to warm your dough.)
Roll your dough from the center, working out and turn it a quarter of a turn after every couple of rolls.
If you see cracks on the edges, that’s fine. You can mend them when you’re crimping later. Roll out to your desired shape and thickness and carefully transfer to your prepared pan. Bake as needed, depending on what type of pie you’re making.
But right before you bake, I recommend brushing the top crust with an egg wash and sprinkling some course or flaky sea salt before baking. This produces a beautifully golden brown crust. 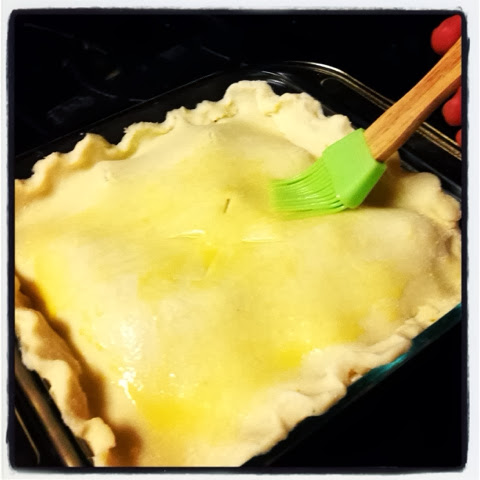
I tested this crust recipe/technique on a Curried Chicken Pot Pie and it was amazing!!
So flaky. So buttery. So delicious.
This is how I’m making my Thanksgiving pies this year!!!
Abbey Wade is a lifestyle blogger from the Charlotte, North Carolina area. On her website, MyEverydayChampagne.com, she shares custom recipes, tips on food and wine pairing, fashion advice and makeup fun... all under an approachable budget and timeline. Stop waiting for a special occasion to feel like you're in one ;-)







No Comments