I’ve been on a health kick lately. If you haven’t noticed, I haven’t posted a traditional dessert recipe in months. I used to bake every week and we would always have something to nibble on in the sweet department. But after the holidays came and went, I just got baked-out. I also got really sick, over and over again, after the holidays and was trying to do everything I could to get healthy again so I guess that caused a pause in my baking. I actually just looked back over my blog history and the last real dessert recipe I posted was for my Pineapple Carrot Cake I made for my son’s 5th birthday…that was 4 1/2 months ago!
And even that one had whole wheat flour and a small fraction of the sugar in the ‘usual’ carrot cake. Even for Valentines Day I didn’t do a traditional dessert and instead made a Raw and Vegan Chocolate Pie to try to compete with the Raw and Vegan Pumpkin Pie with Coconut Cream I created over Thanksgiving (I’m not vegan). So clearly, getting healthy was high on my priority list!! Even still, with all the traditional baking that I used to do, I’m not one of those people who can’t have sweets in the house because of temptation. I don’t like them that much to be tempted by them, as I’m more of a savory girl, but I’m married to a big sweet tooth and have young kids who take after their daddy. So if I’m the one doing all the food buying and making for those sweet teeth, I’m gonna try to make sure the majority of the treats are actually healthy.
So lately I’ve been making a lot of non-traditional goodies that are so healthy that they could be a breakfast, snack or dessert. I make my Raw Cookies about once a week, my Fruit Gummy Snacks about as often, I make my Just Bananas Ice Cream when someone wants something cold and ‘creamy’, I’ve now made my new Gluten Free/Processed Sugar Free Coconut Banana Bread 4 times since I developed the recipe a couple weeks ago, and recently switched my focus onto making the kids a chocolate treat that I wouldn’t feel guilty about serving them. Which brings me to today’s post.
Back in February, when I was sick with my 2nd (or was it my 3rd?) sinus infection, walking pneumonia, and bronchitis, I hosted my mom’s birthday dinner for the family. For dessert I made homemade Cherry Garcia Ice Cream (her favorite) and two different flour-less chocolate cakes. One was made the traditional way with butter and eggs, etc., and the other was made using a Secret, surprising ingredient that I was testing out. I had everyone vote on which one they liked better and a lot of people voted for the Secret ingredient cake (myself included). Since then I had forgotten about those little Secret cakes but recently dug into my notebook to find my scribbled recipe. I saw that I still used a bit of butter, some eggs and some sugar in them back then so this time I wanted to test myself to see if I could make an even healthier version of those yummy, chocolate cakes.
Well, this week I did and I am so incredibly pleased with the results. Only now they’re not chocolate cakes, they’re brownies! When I took out that little bit of butter and eggs (and sugar) from my original recipe, I was left with a brownie-like texture that I happen to like a lot better than what I had before. I made them in muffin tins so the portions are already done for you (perfect for kids!), but you could easily press the batter into a square brownie pan to slice them into squares if you wanted a more traditional looking brownie. Either way you slice it, I’m so happy with these things!! I actually feel the need to pat myself on the back, if you don’t mind the narcissism. I mean, I managed to make legitimately healthy brownies with NO FLOUR, NO ADDED SUGAR, NO EGGS, NO OIL OR BUTTER and they couldn’t be easier to make. So, they’re wheat and gluten free, nut free if you happen to have allergies, and depending on the kind of chocolate you use, they could also be vegan.
This is the part where I let you in on my little Secret. Shhh, don’t tell your resident picky eater, but the main ingredient in these Secret Chocolate Brownies is Chickpeas. A.k.a. Garbanzo Beans. A.k.a. The beans you use to make hummus. Yep, those things. They have a fairly neutral and wonderfully nutty and rich flavor, a creamy texture when you make it into hummus so…why not make it sweet instead of savory? Why not, indeed.
These brownies are absolutely delicious!! Even Mr. Sweet Tooth himself
loved them. And when I gave them to my kids for dessert after dinner
that first night, watching them gobble them up with giddy laughter, a
Secret smile formed across my face.
Shhhh….
*Abbey’s Secret (Healthy) Chocolate Brownie Cups
(yields 12 cupcake sized (2 oz) brownies)
Before we melt it, we must first speak a few words on chocolate…
I’m using semi-sweet chocolate chips because 1.) They’re super easy to find at any grocery store and 2.) They have the right amount of sweetness, without adding any extra sugar, for my particular taste. And the better quality chocolate chip you use, the better and the less likely it will be packed with preservatives and unnecessary fats and sugars. Obviously, the higher the percentage of cocoa in your chocolate product, the healthier it will be, but also the less sweet it will be. If you want to use a darker (more cocoa) chocolate product for health reasons, go for it! But you may wish to add a sweetener to the ‘batter’ before baking. I would recommend some agave nectar, a bit at a time, until you like the taste. This recipe is just sweet enough for me, so I don’t need to add any sugar, etc. but you may like things a lot sweeter than me so TASTE IT BEFORE BAKING IT and make it your own.
Now onto the recipe.
First we melt the chocolate…
-Place 1 3/4 cups of semi-sweet chocolate chips (you will need a total of 2 cups) into a microwavable, glass bowl and microwave for about 2 minutes, stirring in between, until when you stir it with a spatula, it melts completely. Stir in your remaining 1/4 cup of chips to ensure that you haven’t heated the cocoa butter too quickly (the added chips will melt into the already melted chocolate once you stir it in and will also fix any possible overheating you may have done in the microwave. Yes, you can use a double boiler but this is my easy method.)
In the bowl of your food processor, add the following before or while you’re melting your chocolate…
-2 (15 oz) cans of chickpeas, drained and rinsed
-1/2 tsp baking powder
-1 tsp or a good splash of vanilla extract
-2 tsp of espresso powder
–rounded 1/2 tsp kosher salt (or up to 3/4 tsp, depending on if you wish to add a sweetener to the mix later)
Add your melted chocolate to the other ingredients in the food processor and puree it all together until very smooth. This may take several minutes of stopping and scraping down to ensure a smooth texture. You really want to make sure you aren’t left with a very grainy ‘batter’.
Once your mixture is completely smooth, use a medium sized (1/4 cup/2 oz), greased ice cream scoop to easily and exactly add some batter into the greased cups of a standard sized muffin tin. I get exactly 12 brownies this way. And you must, you must, you must, lick the spatula…and the bowl. (Remember, no raw eggs in here!)
With wet fingers, press down to flatten out the batter in each cup. These won’t puff up after baking, so the way they look going in is pretty much how they’ll look coming out.
Bake in a preheated 350 degree oven, 15 minutes for a fudgey brownie with a slightly gooey center or about 18-20 minutes for a more cakey, crumbly brownie. (I’ve done them both, and they’re delicious either way.) They will continue to firm as they cool so it’s OK if they seem a bit too loose…and there is nothing scary in the mix so no worries about under-cooking anything you’re not supposed to!)
Allow to cool in the muffin tins until they’re only warm. This helps them firm up instead of falling apart if you were to try to move them when they’re to hot.
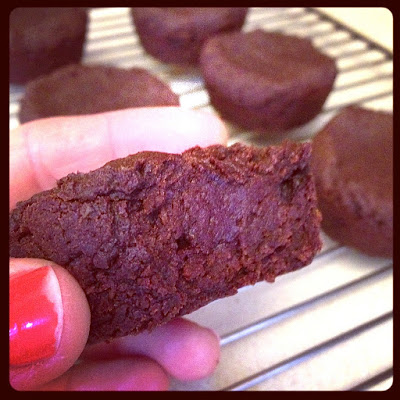 |
| ignore the bad manicure, but take a look at that fudgey brownie!!! |
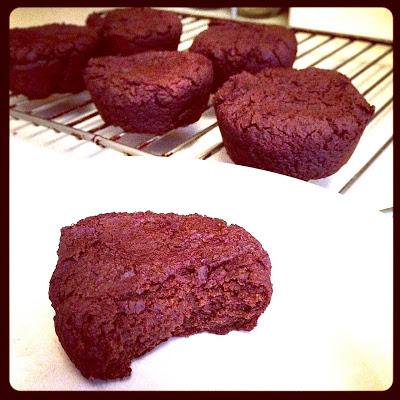
Serve warm or room temperature, or cool completely on a rack and store in an airtight container on the counter for a couple days or in the fridge for about a week (but I seriously doubt they will last that long!)
Yum!!!!!
For a more decadent version of these healthy Brownie Cups, try this…
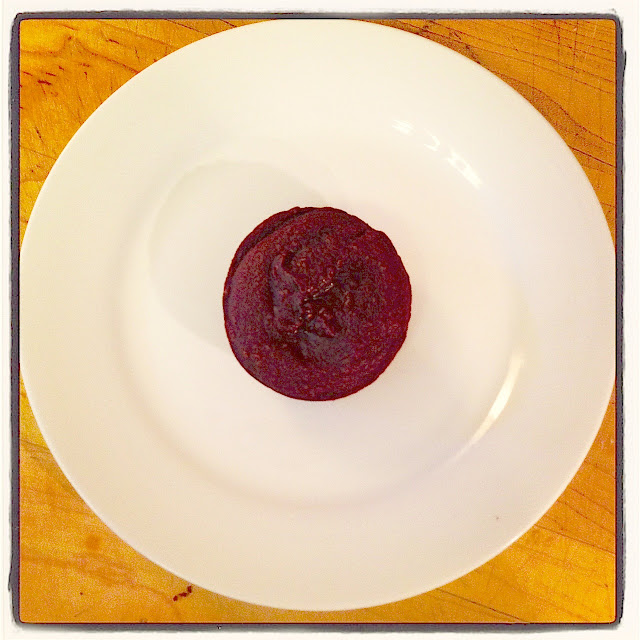
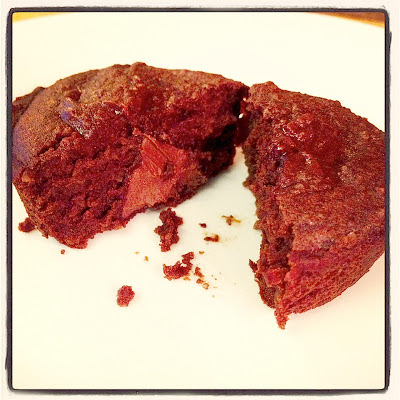
-Before baking, press a Hershey’s kiss or small piece of chocolate into the center of each and cover it up with your fingers. Bake as usual but be sure to serve very warm.
Now you’ve got a molten chocolate brownie cup!!
OK, so I don’t usually give nutritional information with my recipes because that’s not how I cook (or eat) but I thought this would be fun to share the difference in my brownies versus a standard brownie made from a mix (mainly because I’m just excited about it). A calorie is a calorie and a fat gram is a fat gram, BUT what your body does with those calories and fat grams makes a world of difference. The calories and fat you’re ingesting from a traditional brownie recipe is coming from white sugar, white flour, vegetable oil, etc., which doesn’t really do your body any good and the calories and fat you’re ingesting from my healthy brownies is coming mostly from beans, a healthy, natural source of fuel. I don’t know about you, but if my mouth thinks it’s eating a brownie anyway, then why not make those calories count? Um…Brownies for breakfast, anyone? 🙂

No Comments