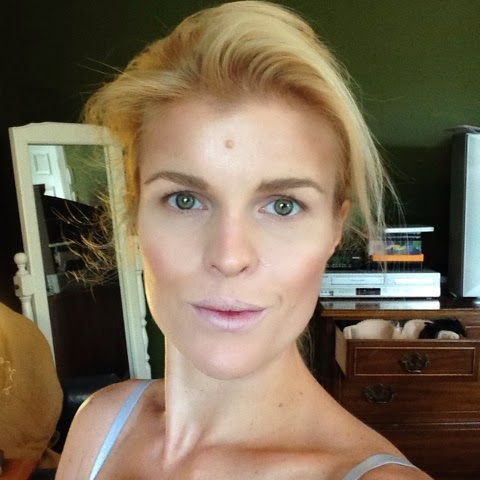
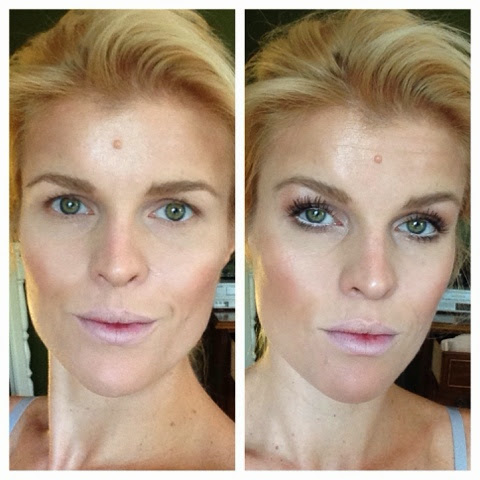
Last week we left off with an easy, flawless face. (http://everydaychampagne.blogspot.com/2014/04/makeup-monday-flawless-face-when-you_14.html?m=1)
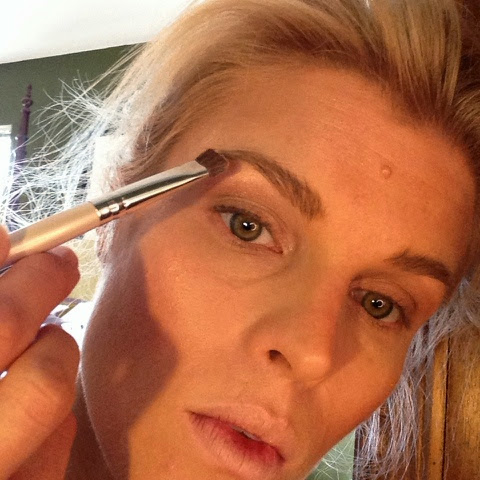
I showed you how I do a small amount of contouring to fix a puffy face, and fill in the eyebrows to open the eyes. And I looked this this after it was finished:
Now I’ll go into the next step, which is eyes. I’m a big eye makeup person. Love me some mascara. I have really small eyes and very fine eyelashes so my eyes are a bit invisible without makeup. I think that’s why I enjoy putting on eye makeup so much- because it really allows my eyes to actually be seen.
I enjoy a lot of different ways to make up the eyes, but my go-to eye makeup, when I just want them to pop and shine, is this one I’m showing you today. And remember, I don’t edit or retouch any of these Makeup Monday photos, (so watch out for some unflattering shots!!) because I happen to believe that’s cheating 😉
Here we go-
First make sure there are no foundation creases on your eye lids. Smooth them out with your finger if there are. Dust your lids with a bit of loose powder, blow off the excess.
Next take a brown-taupe eyeshadow palate, here’s my fav:

(Cover Girl in Shimmering Sands #110)
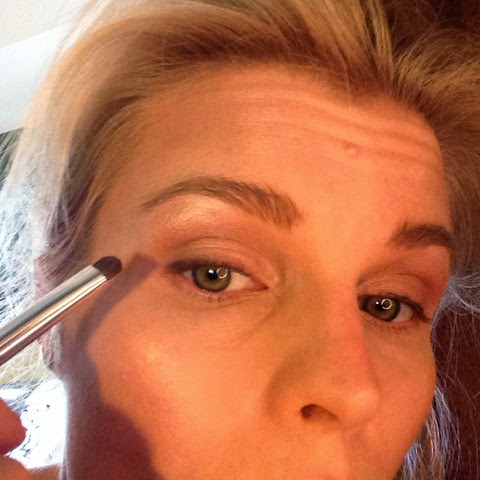
and use a standard eyeshadow brush, one with medium bristles, to put the middle color, or a neutral-taupe shade all over the lid up to the brow bone. (I prefer my shadow to have some shimmer but using a matte palate would work as well)
Then take the darkest shade and, using the same brush, place some along the brow bone itself. Focus on the outer area of the brow bone and blend with the brush.

Next take the lightest shade-one that’s closest to a white- and add it above the brow bone, directly below the eyebrow arch.
Take that same very light shade and add some to the inner corner of the eye.

Next take a chubby and soft dark brown eye pencil, this one is my fav:

(NYX jumbo eye pencil in Dark Brown #602)
and dot along the upper eye lid, as close to the lash line as possible. Do not go all the way to the inner corner of the lid-only along the outer 3/4 of it. (Taking a liner to the inner corners of the eyes makes them appear smaller.) Get in between the lashes and really try to not make a line, but rather make little dashes or dots that will later be smudged.

Then take a short bristled shadow brush, one made for smudging that looks like this:

(e.l.f. smudge brush)
and tap it in the darkest shadow shade, the dark brown one we used for the brow bone, and then go over the pencil ‘line’, smudging it.
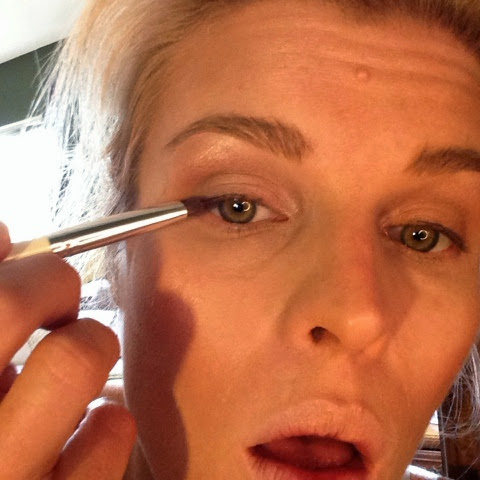
The line should now be very soft.
Do the same to the lower part of the eye, again being sure to not draw a line, but make little dashes that will be blended with the smudge brush.


I like to extend the smudging down a bit on my lower lash line because this makes my eyes appear bigger.
Next I like to line my water line with a white pencil. Because I have very small eyes, this helps me ‘open’ them up. Here’s my fav white eye pencil:
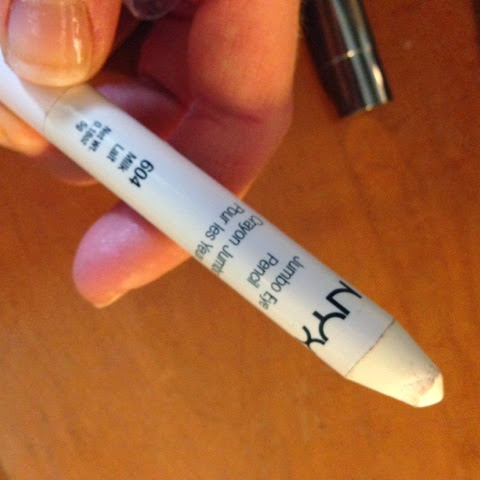
(NYX jumbo he pencil in Milk #604)
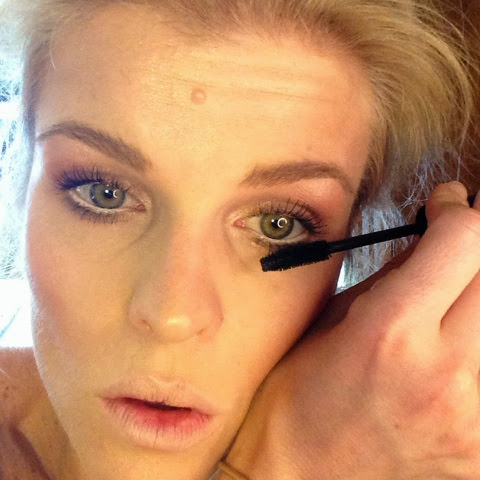
I line along both the upper and lower inner rims, known as the water line.

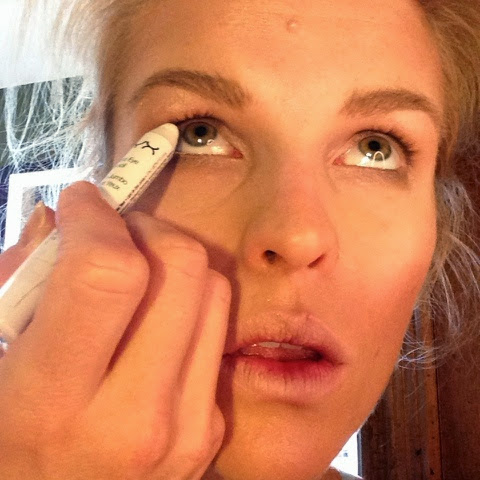
I’ll show you the difference in my eyes, one has the inner rims lined with white, one doesn’t. Can you see the difference?

Now it’s mascara time!! I’ve tried almost every mascara on the market because I love the stuff so much but always come back to my favorite- the one I’ve been using since high school. And only recently did I find another that I like to use in conjunction with it. I find that if you use two different formulas on your lashes, you get a better result. So take your favorite thickening mascara and your favorite lengthening mascara and double up. You’ll notice a huge difference, I promise.
Here are my favs:
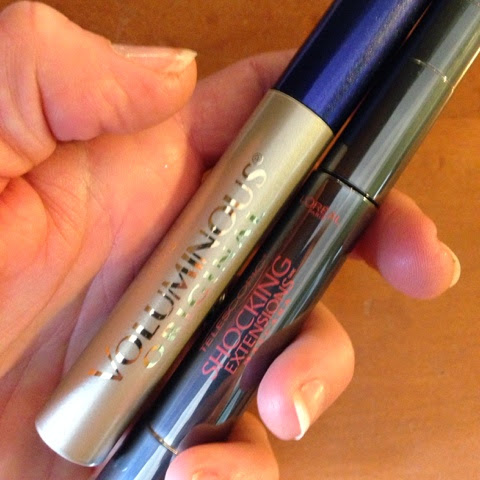
(Loreal Voluminous Original in Blackest Black (my old friend) and Loreal Telescopic Shocking Extentions in Blackest Black)
Start with the thickening mascara (the Voluminous) and wipe the excess mascara off the tip of the wand before putting it on your upper lashes. Start at the base of the lashes and wiggle the wand from side to side as you brush upwards to the tips of the lashes.
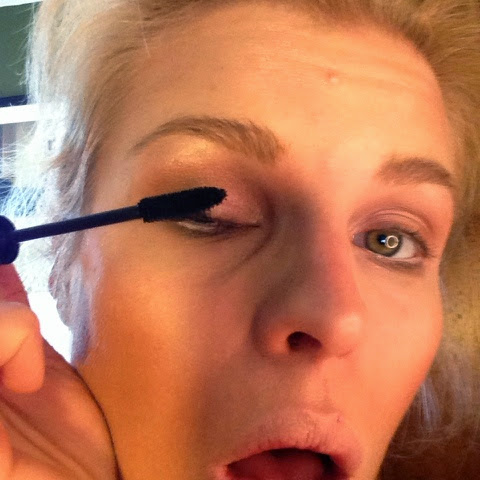
(Uck- well, now you’ve seen my mascara face. Come on, you all know you do it too.)
With the wand, take the outer lashes outwards to really open up the eye. Do this until all your lashes are coated. Then take that same wand, without dipping it again, and run it vertically along the upper lashes. This helps separate them and reach the lashes that are harder to get to.
(Really focus on making the lashes go outwards instead of straight out. This really helps to make your eyes wider and stand out.) Using the mascara that is left on that same wand, brush some onto the lower lashes.

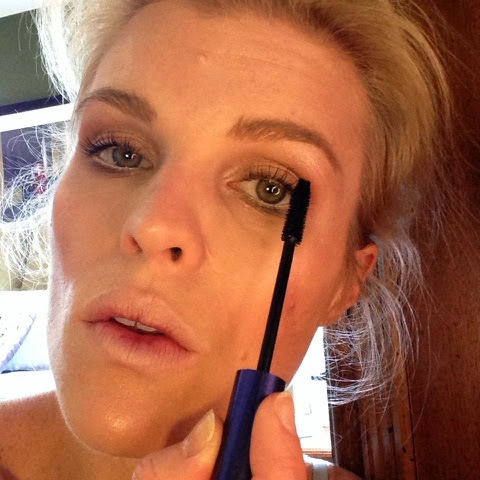
Next take your lengthening mascara (the Shocking Extentions) and, while your lashes are still wet from the previous coat, go over them again in the same manner as you’ve already done.
Here’s the difference in my lashes- one has just the one coat of the thickening mascara and the other has the second coat of the lengthening one on top. You can really see the difference that makes:
After your lashes are all coated, use a metal-toothed lash comb to separate them if need be. But that Shocking Extentions mascara has such a fine-toothed wand that I very rarely have to use one.
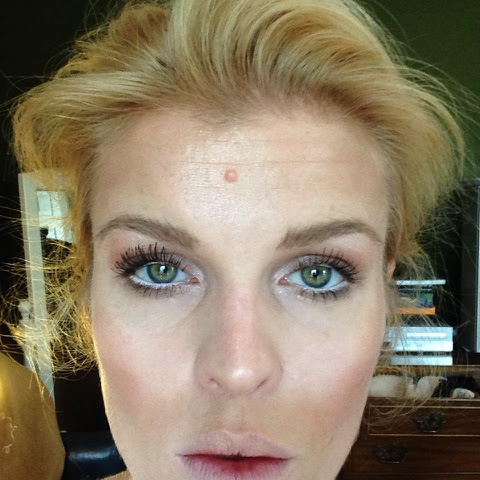
Now you’re done with your eyes!

This is a perfect eye for day or night time and it really works year round. If you want to have some fun and add some drama, just change up the color palate to a navy, olive green or plum:
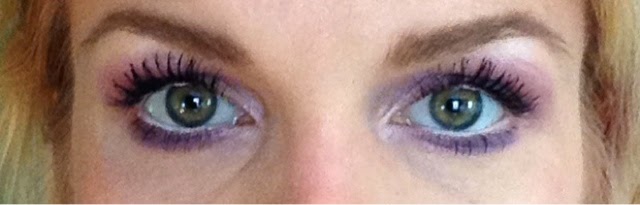
Same rules apply!!
Next Makeup Monday will focus on the kisser.

No Comments